I love finding creative ways to incorporate S.T.E.A.M into Physical Education. S.T.E.A.M stands for Science, Technology, Engineering, Arts, and Math. I was at my daughter’s Open House for her enrichment class in Bayport where she was showing me how her class was using Ozobots to practice coding. I was immediately intrigued by these little coding robots. I immediately noticed how the students’ faces lit up with excitement as they explained to their parents all the functions you could perform with them. Immediately I thought: what if we combine fitness activities with coding? What a great way to relate to the student’s interests and get them excited about fitness!
If you are not familiar with Ozobots, they are little robots with sensors that allow you to program behaviors you want the Ozobots to perform. Ozobots move by detecting the color of the line underneath it. They follow lines using a back-and-forth motion. The Ozobots also detect a combination of colors which are programmed for more complex commands such as “turn around,” “turbo speed,” “backward walk,” etc. Check here for more info on Ozobots.
My creative juices were flowing! These coding robots are such powerful tools to engage students in hands-on learning. I knew I had to get my hands on some Ozobots immediately. I went into school the next day and reached out to my co-workers to see if anyone had any they would allow me to borrow. My librarian and one of the Kindergartner teachers emailed me back immediately. I instantly had twelve that just needed to be charged and they were ready to go.

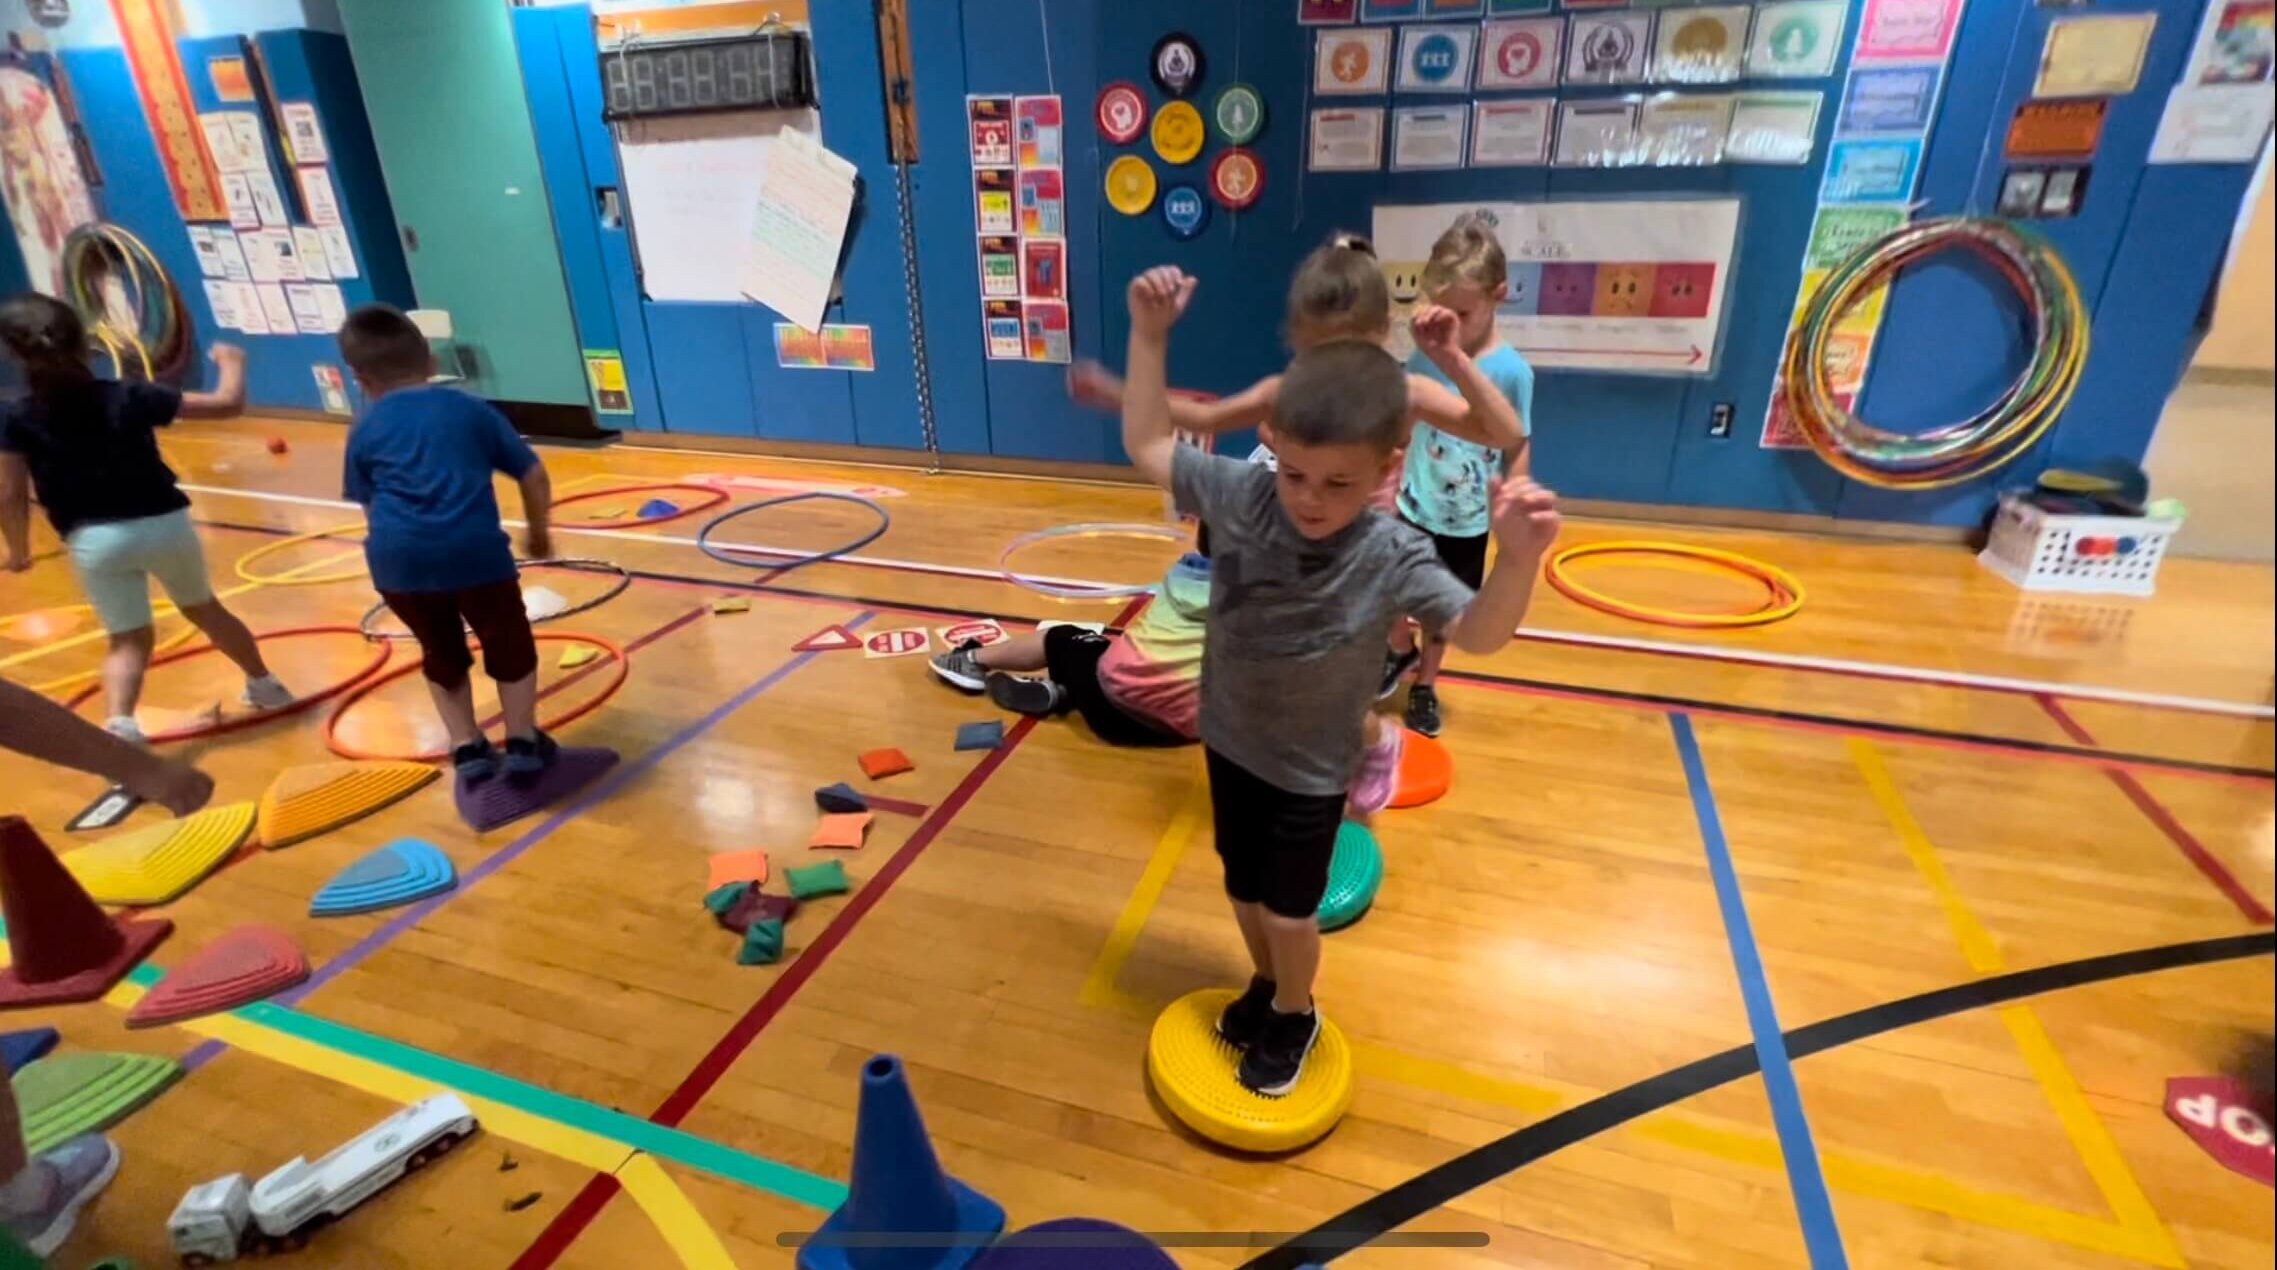
One of the units I teach in kindergarten through 2nd grade is Pathways and Levels in PE. I teach pathways directly after my locomotor unit. Locomotor skills are skills that move your body from one place to another such as skipping, galloping, jumping, hopping, slide stepping, leaping, walking, jogging, running, rolling, crab walking, and bear crawling. Once the students are familiar with these locomotor skills, I can have them practice them while learning about the 3 different pathways (straight, zigzag, and curved), moving at different levels (low, medium, high), and moving at different speeds (fast, medium, slow). The Ozobots would be a great supplemental material to enhance my students learning of pathways, speeds, and levels due to the fact that the students can program.
Level #1
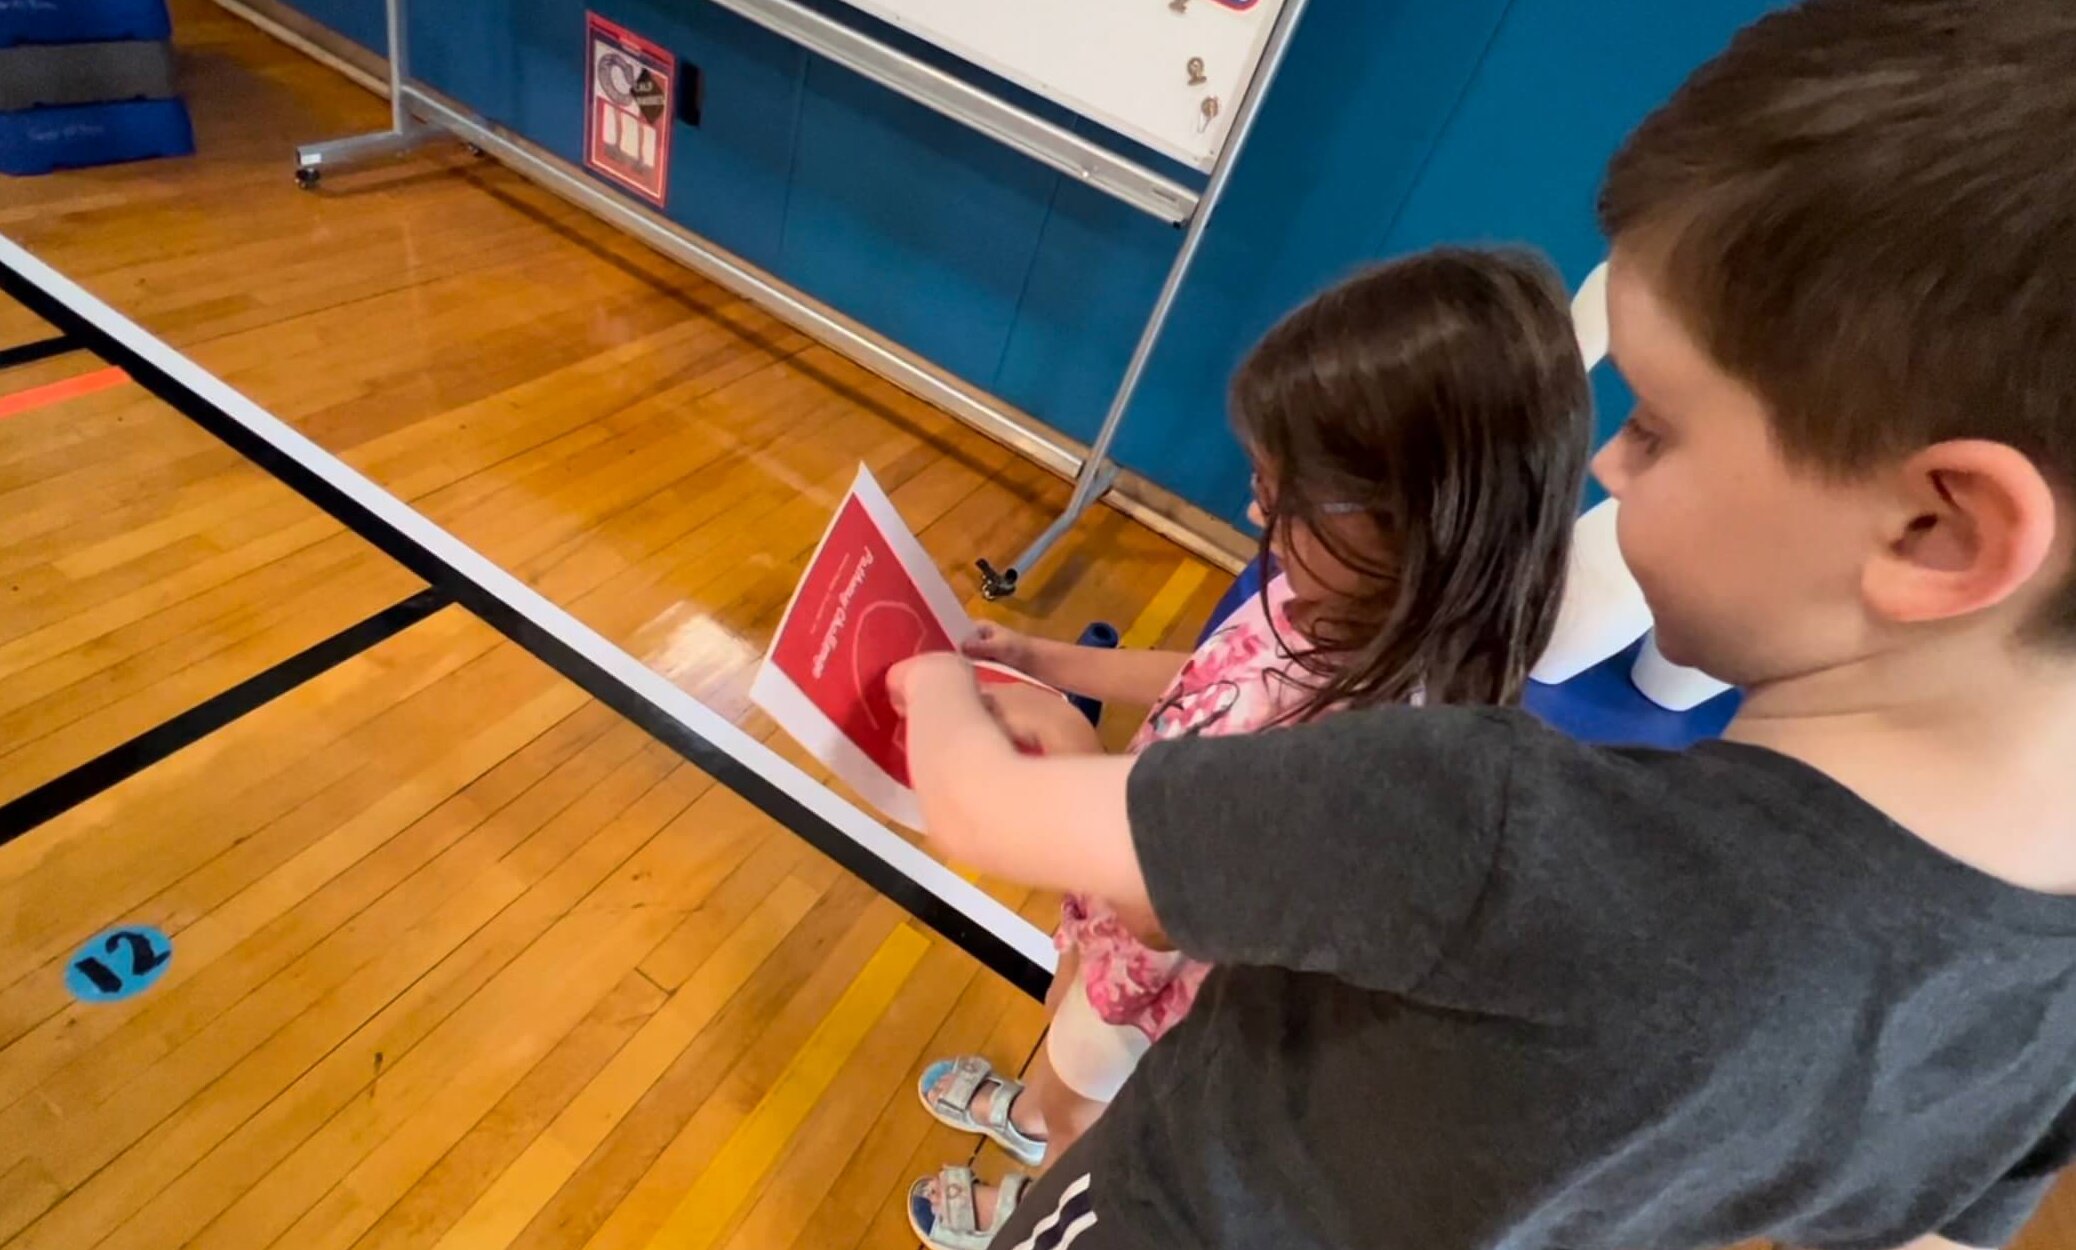
I started by teaching the students how to first read a map while they became familiar with the 3 pathways they can move in. First, I used Michael Beringer (PE-4-kids) Pathway Challenge . I printed out a map for each child and I had them follow the different pathways on the map using a specific locomotor skill. Every minute I would call out “Switch.” At this time, students would switch their maps with a friend and I would switch their locomotor skills. This activity helped the students become familiar with zig-zag, straight, and curved pathways and helped me assess who still needed to work on particular locomotor movements.
Level #2
In Level #2, I introduced coding and the engineering design process. Coding is the process of creating steps/instructions that computers can interpret and perform. The engineering design process is a series of steps (7 steps) that engineers use to find a solution to a problem. I love having the students use this process because it lends itself to a growth mindset and encourages students to see failure as a step toward learning.
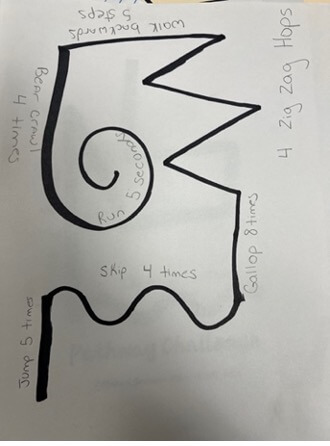
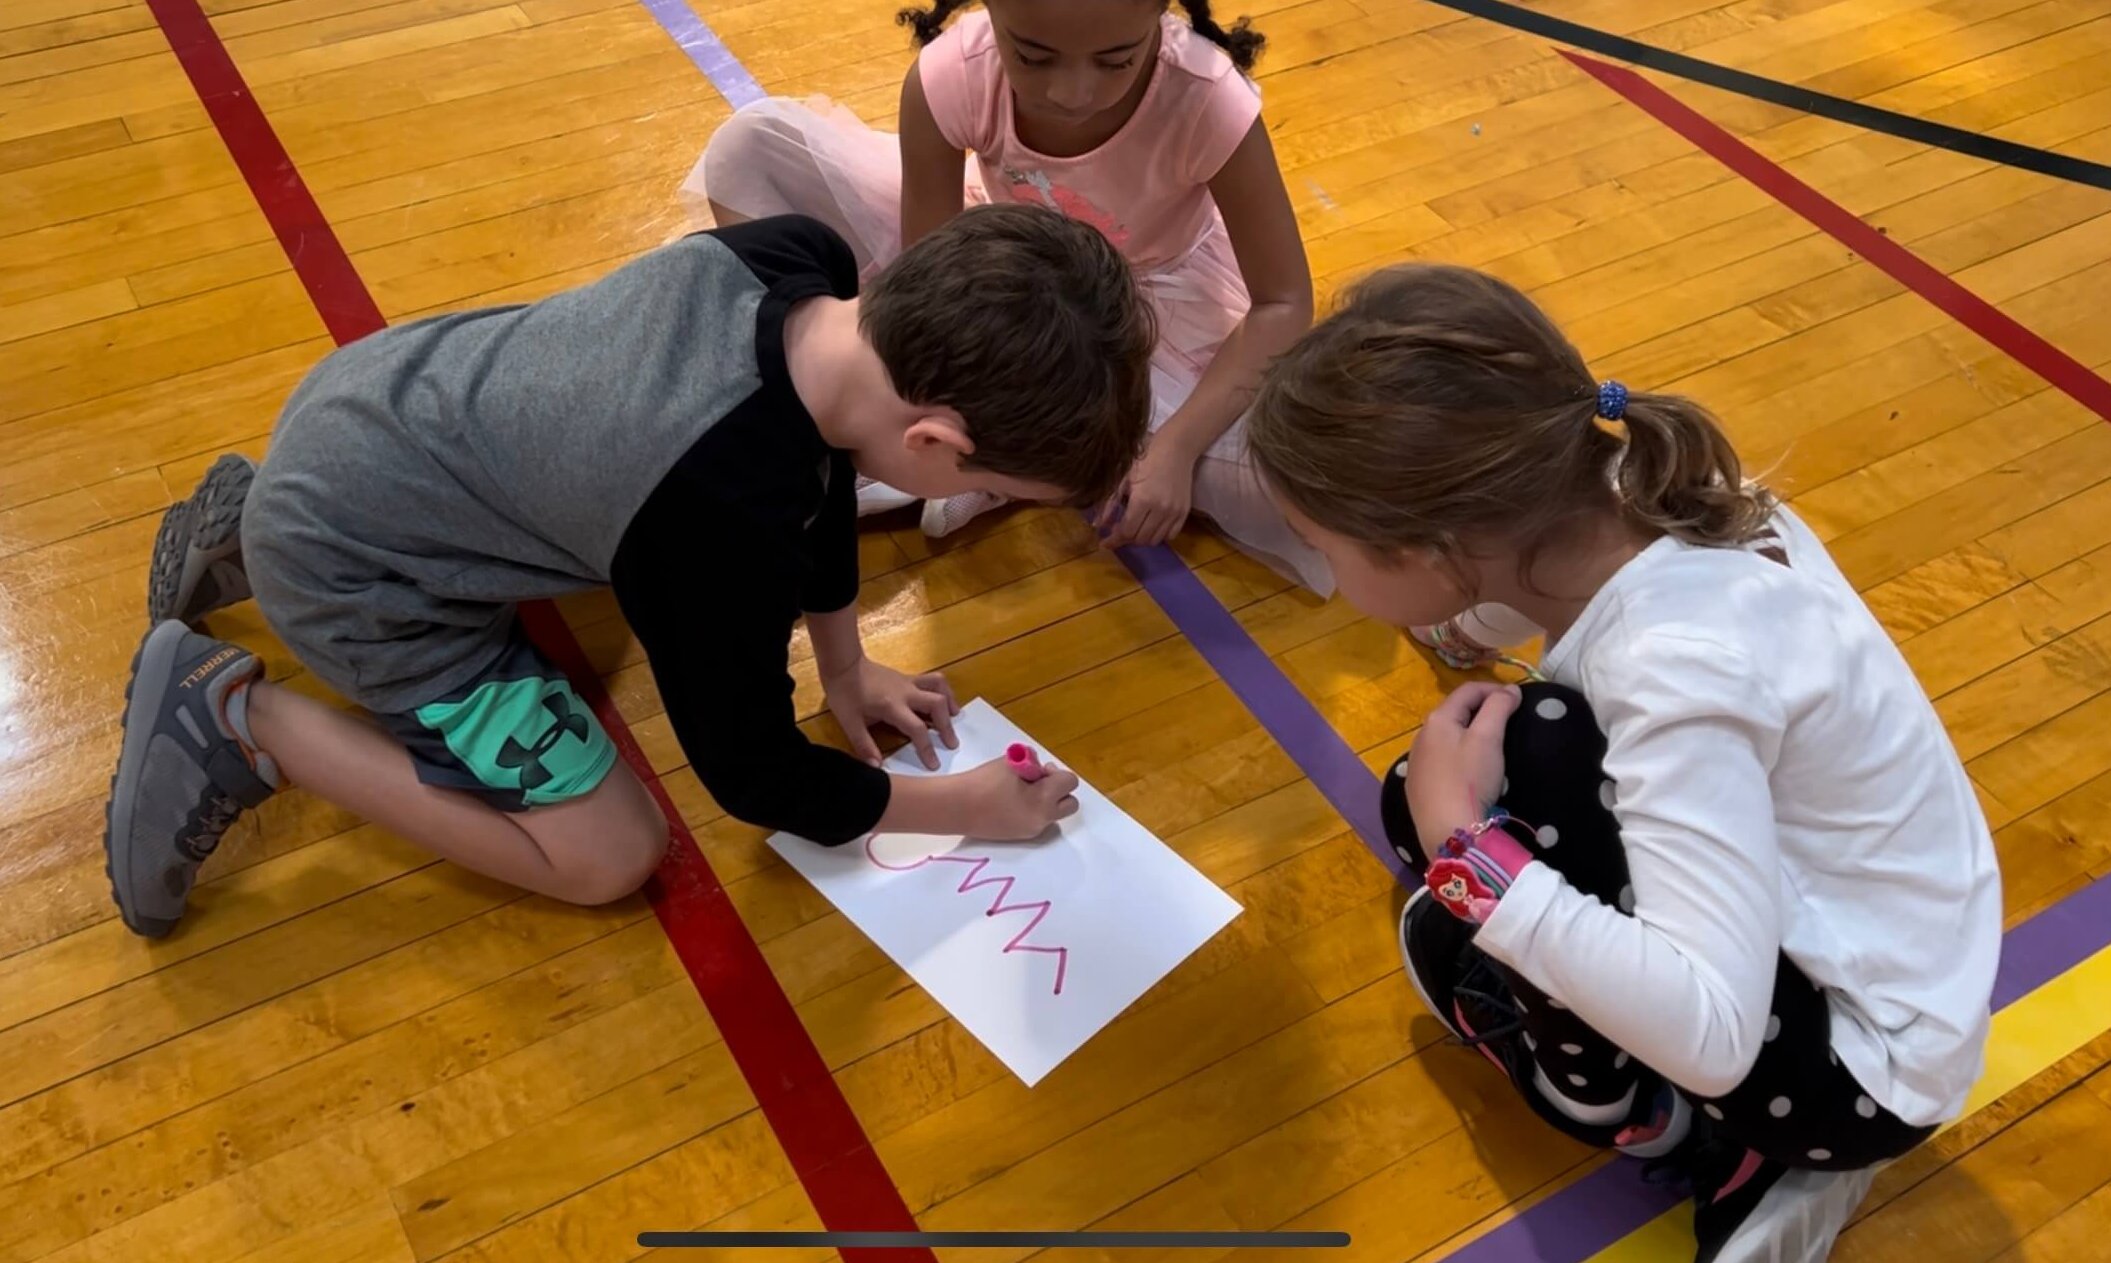
At this level, student A was the programmer and student B was the computer who followed the coded pathway. I gave each student a blank piece of paper and they had to create and code their own Pathway map. The prerequisites were that all 3 pathways had to be represented, use at least 3 locomotor skills, and specify how long they would be performing each locomotor skill (i.e., 5 steps, 5 seconds). (See picture below). We used the engineering design process to create our maps. My students learned that first, we have to define the task (create a map using all 3 pathways, a minimum of 3 locomotor skills, and the length of each skill), generate ideas for our map design, plan it out, create it on paper, test the map design using a peer, make needed improvements, retest with a peer, and share results.

Once the students finished with the initial design, they would switch maps with a friend and test out each other’s designs. Students would then reflect on their map. Did their peer find it easy to follow? Do any changes need to be made? Students would then make the needed design changes and have a student try their course again. After, they would gather feedback and make any additional changes.
Level #3: Build the Mario Obstacle Course
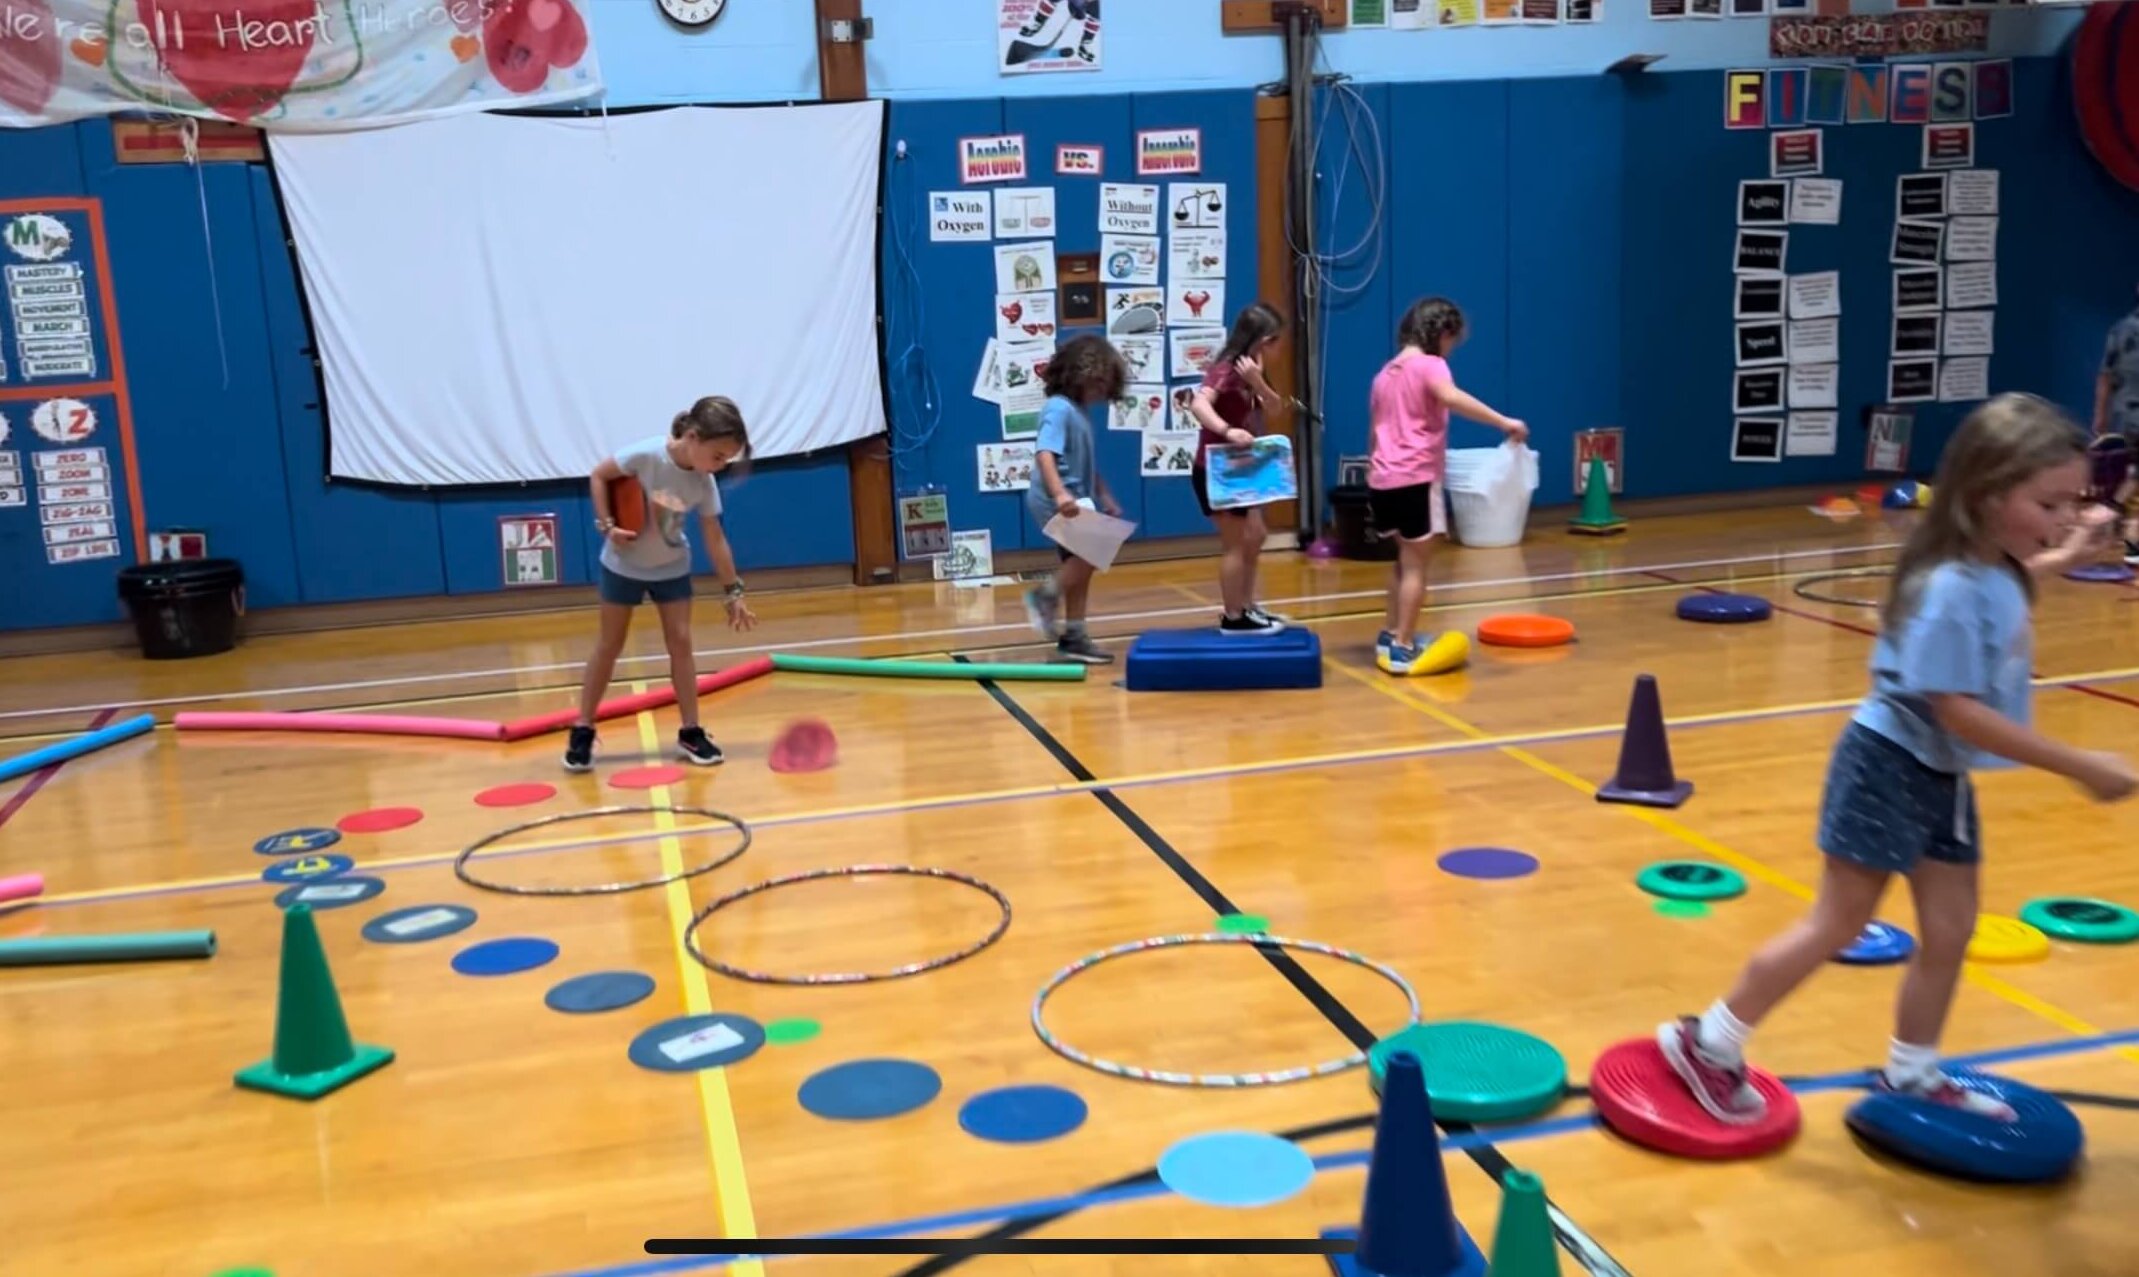
In Level #3 we dove deeper into the engineering design process because the students had to design an obstacle course based on their interpretation of a Mario movement map I created. The students were told that they had to recreate the map using any of the equipment in the gym and move through it just like Mario.
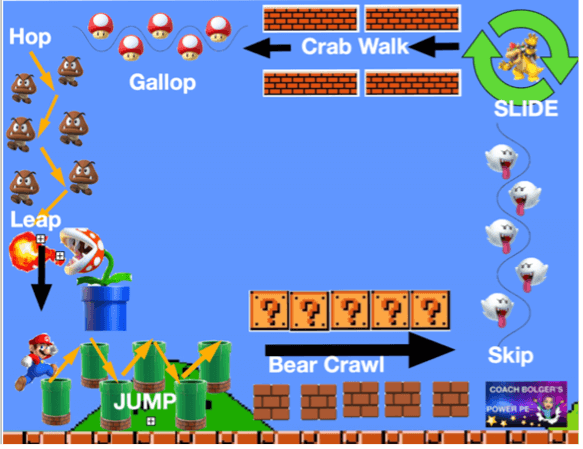
For example, at the beginning of the map where you see Mario jumping in a zig-zag 6 times from tunnel to tunnel, the students will also have to jump in a zig-zag pattern 6 times. Now, since we do not have tunnels in the gym, the students could use any of the equipment in the class to interpret the Mario map. Some of the equipment I placed out was poly-spots, aerobic steps, cones, trampolines, balance beams, stepping stones, hula-hoops, etc. The students were told to be creative when interpreting their maps. For example, on the map, Mario starts by jumping zig-zag across the tunnel 6 times. Some of my groups used hula-hoops as tunnels, other groups used aerobic steps to zig-zag jump across and others used trampolines. After they built their interpretation of the map, they got to test it and make any changes they needed to. Then they tried out the other group’s Mario map interpretation. The students loved it!
Level 4
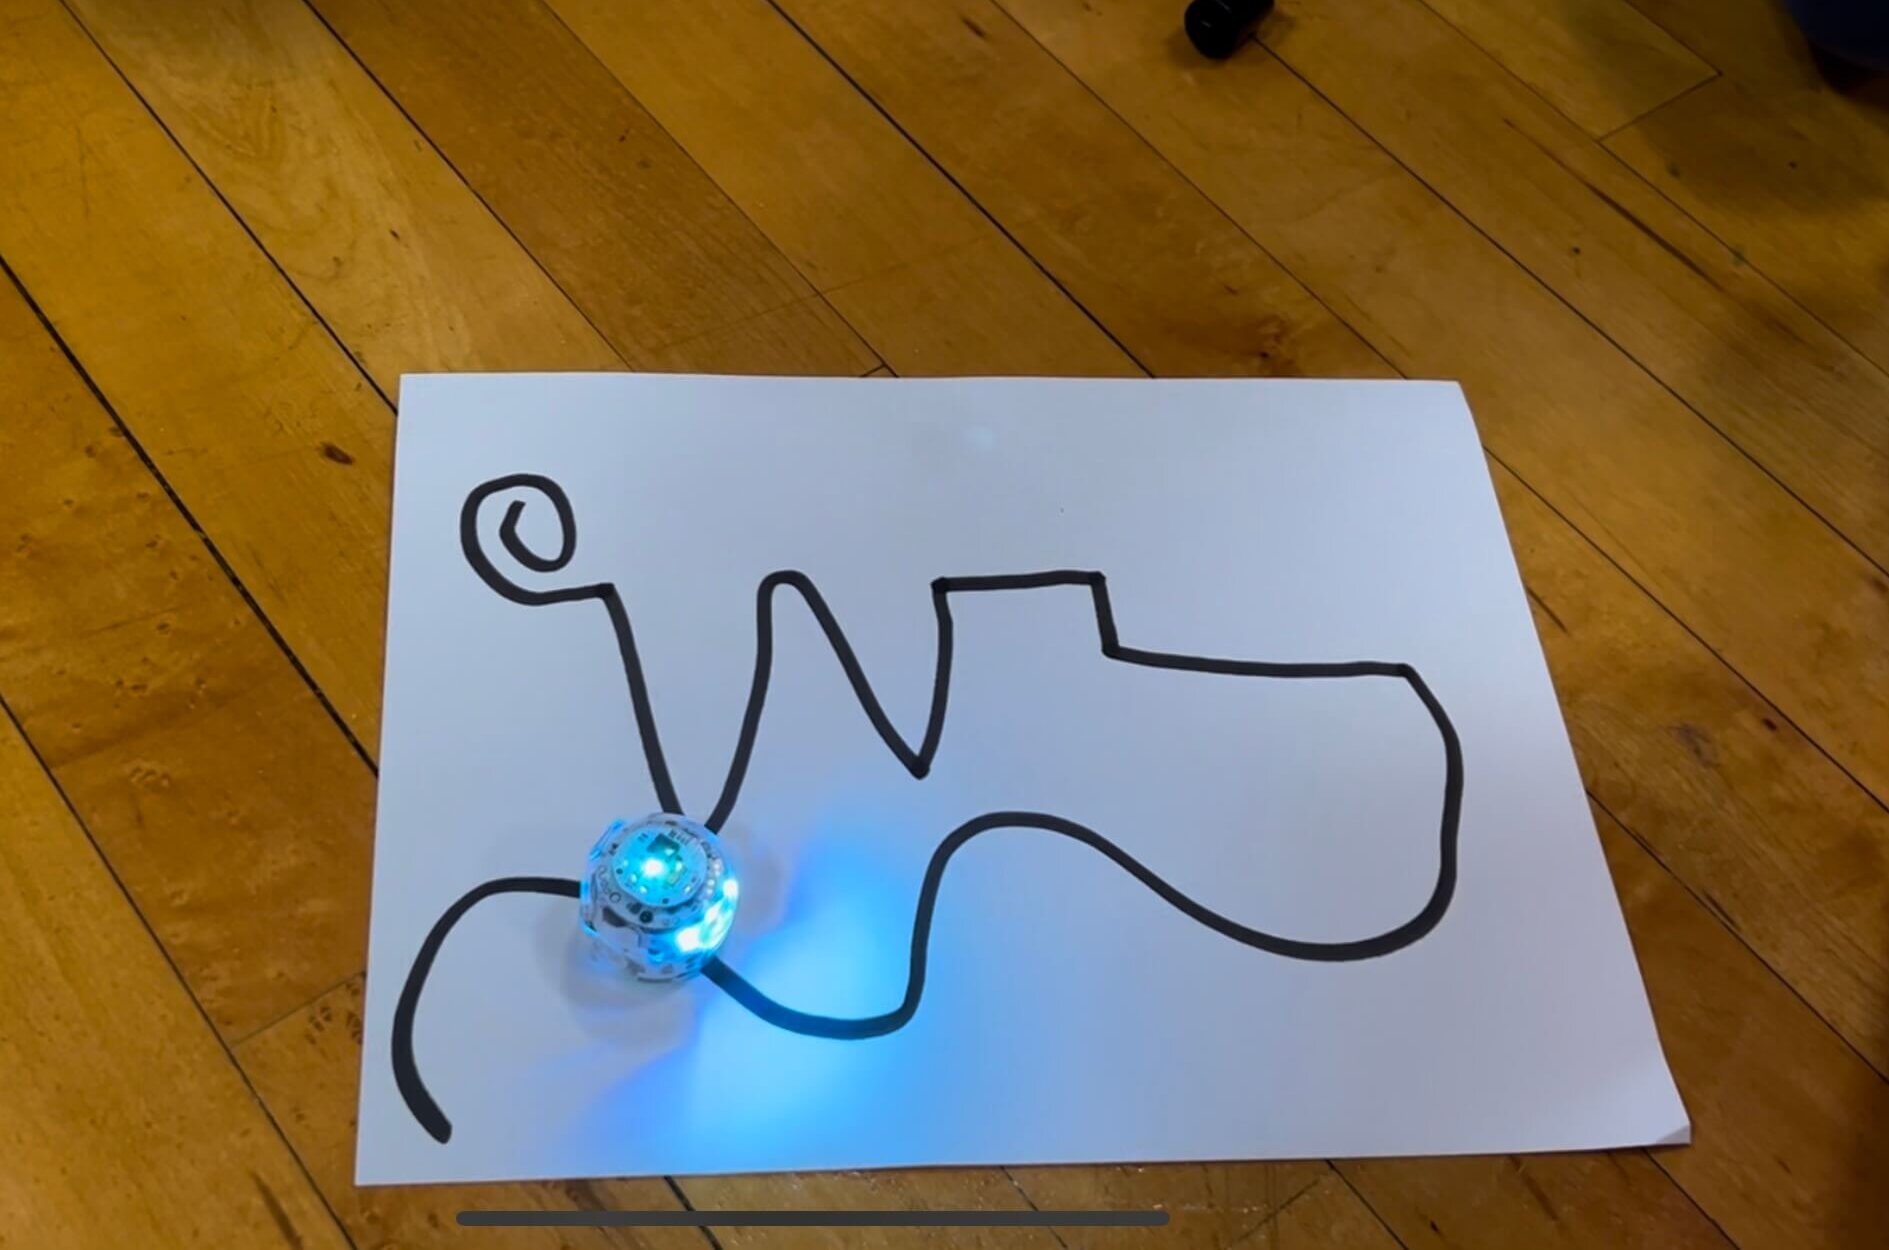
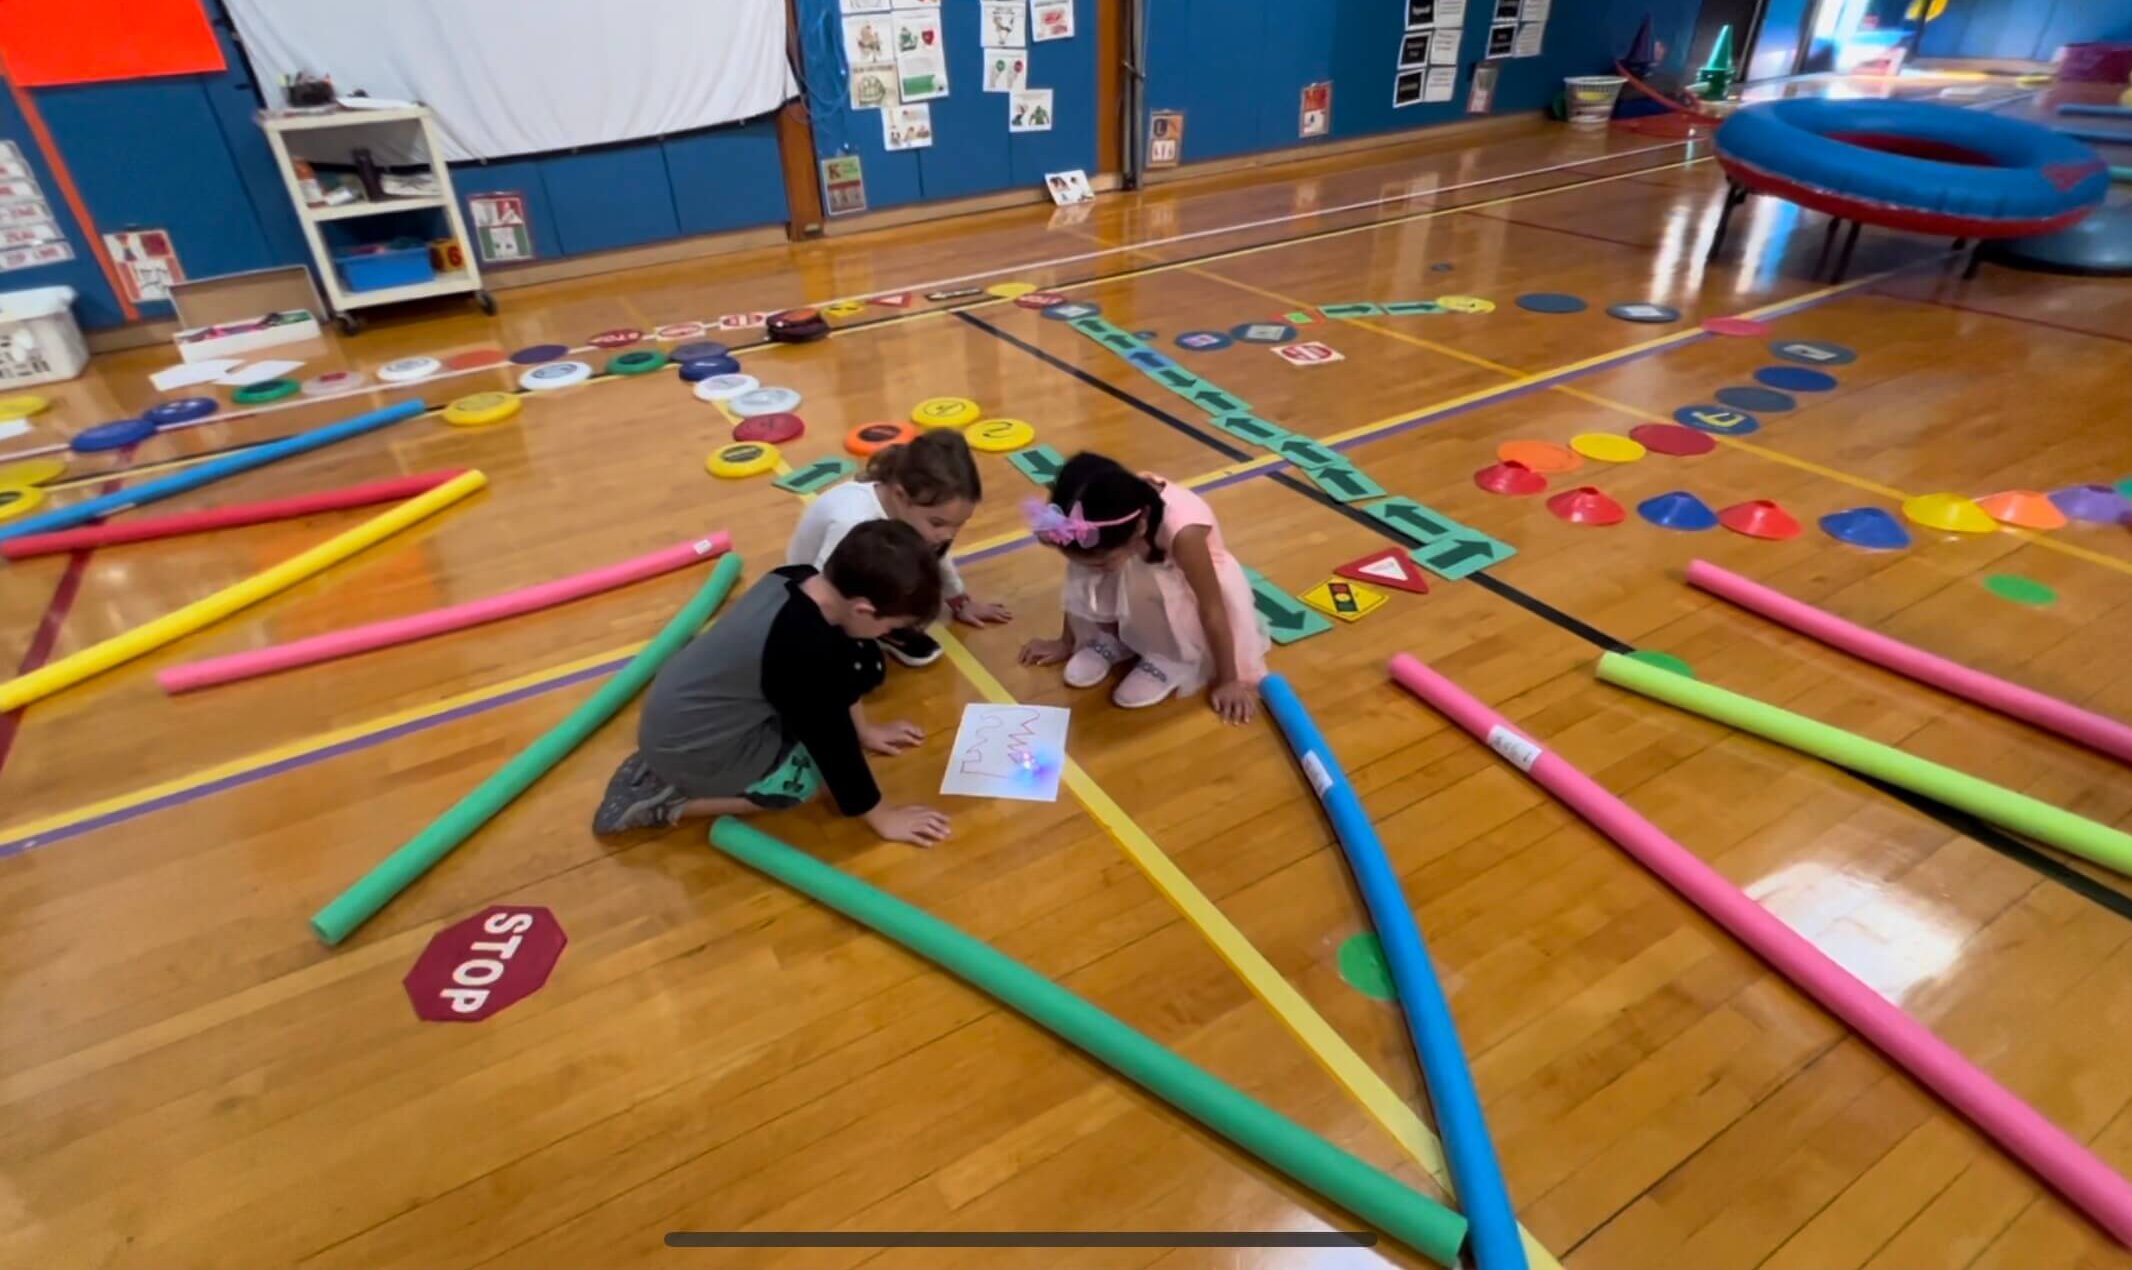
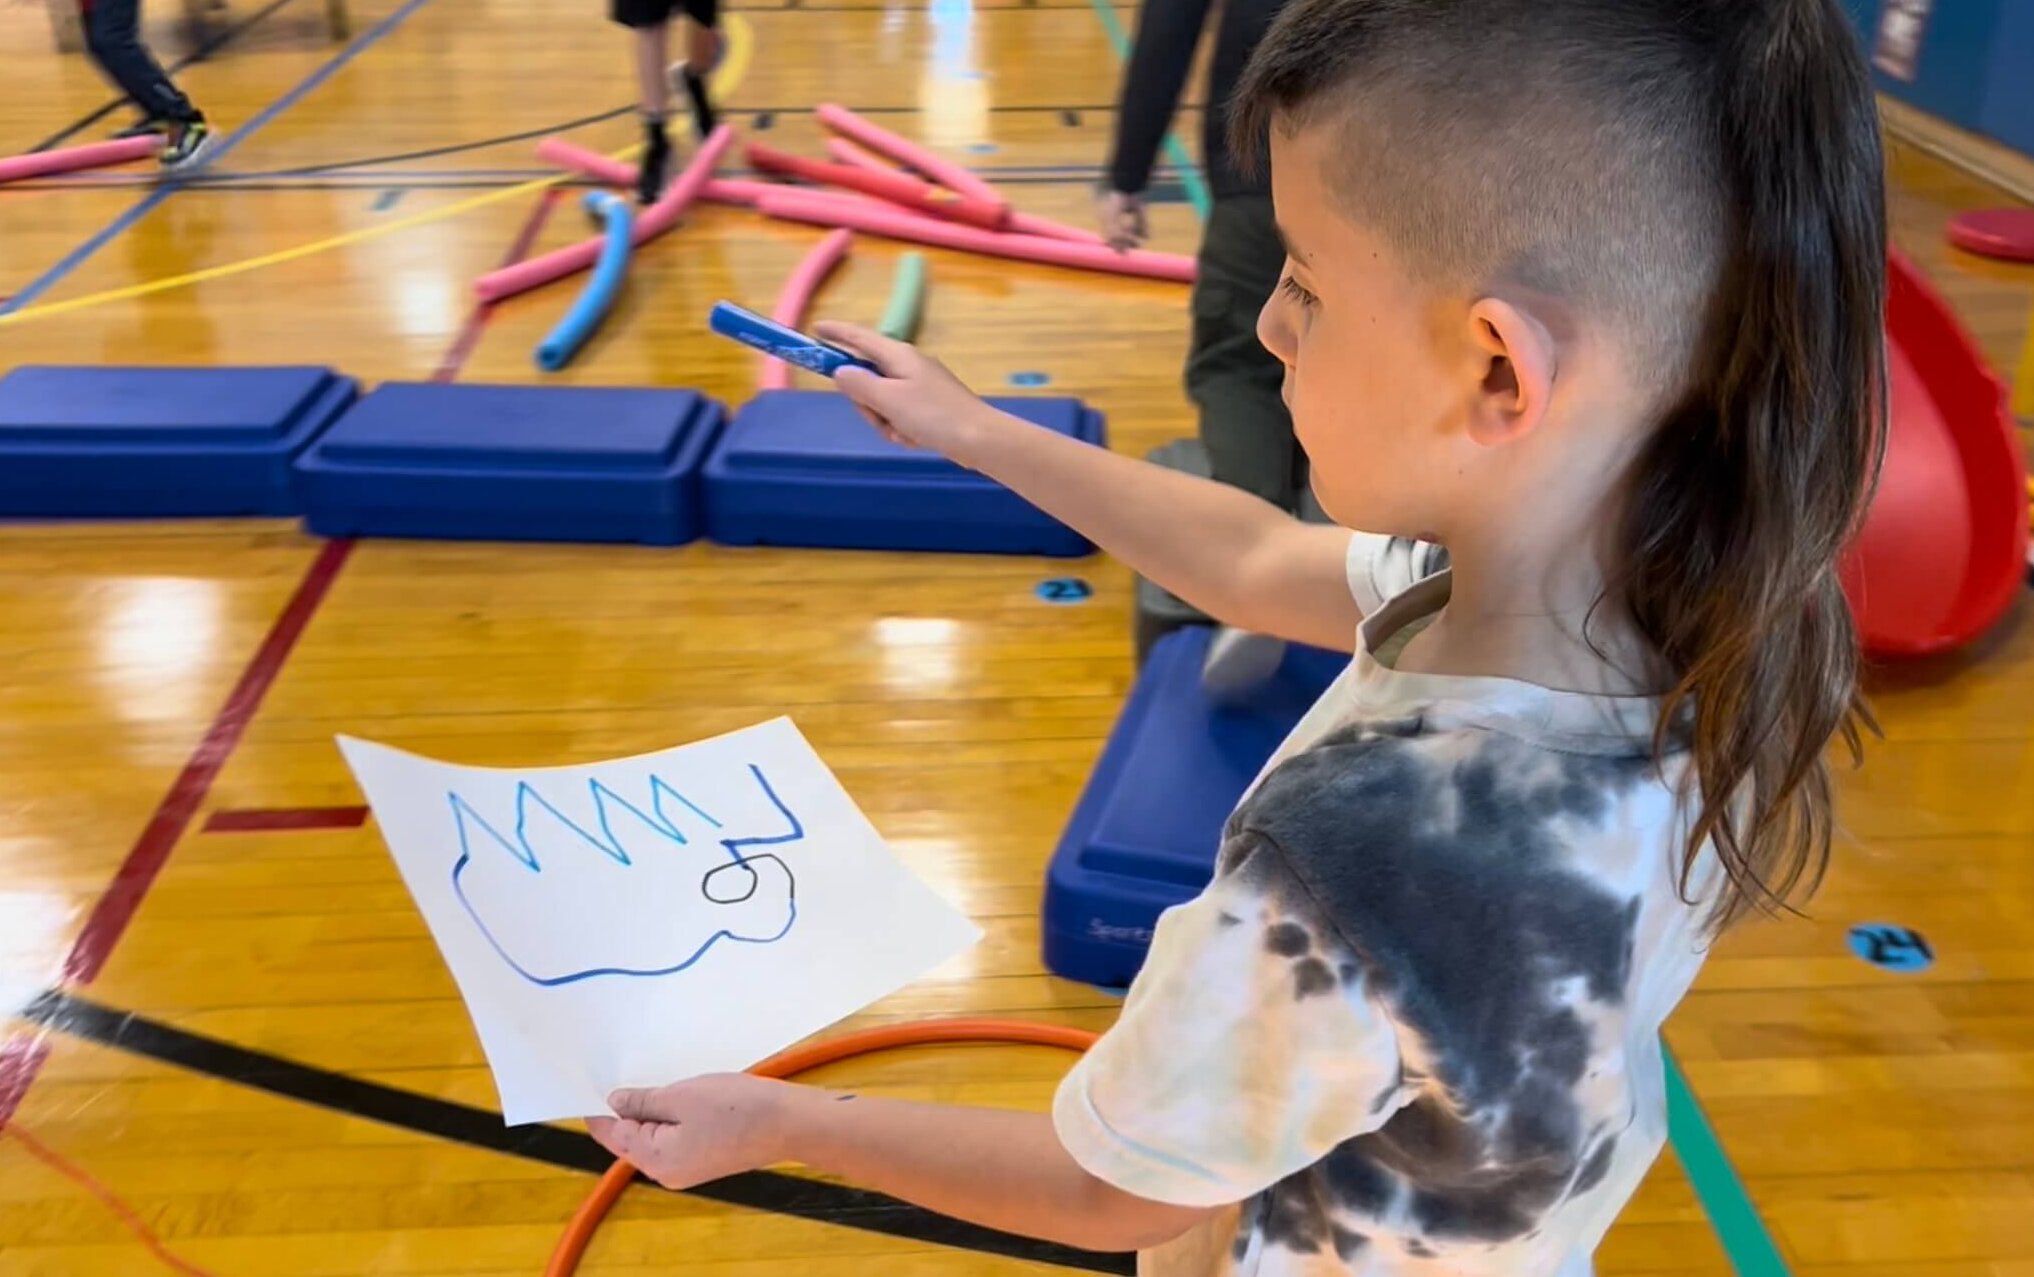
In the fourth level, robotics was introduced. First, I demonstrated how to turn on and off the Ozobots and how to code the path with markers and paper. The students had to design a pathway map, on paper from scratch, for the Ozobot to interpret and follow. Again, the path had to contain the 3 different pathways, at least 3 different locomotor skills, and 3 different levels. Once the path was created, they had the Ozobot follow the coded path. Once the Ozobot was successful, on to part 2!
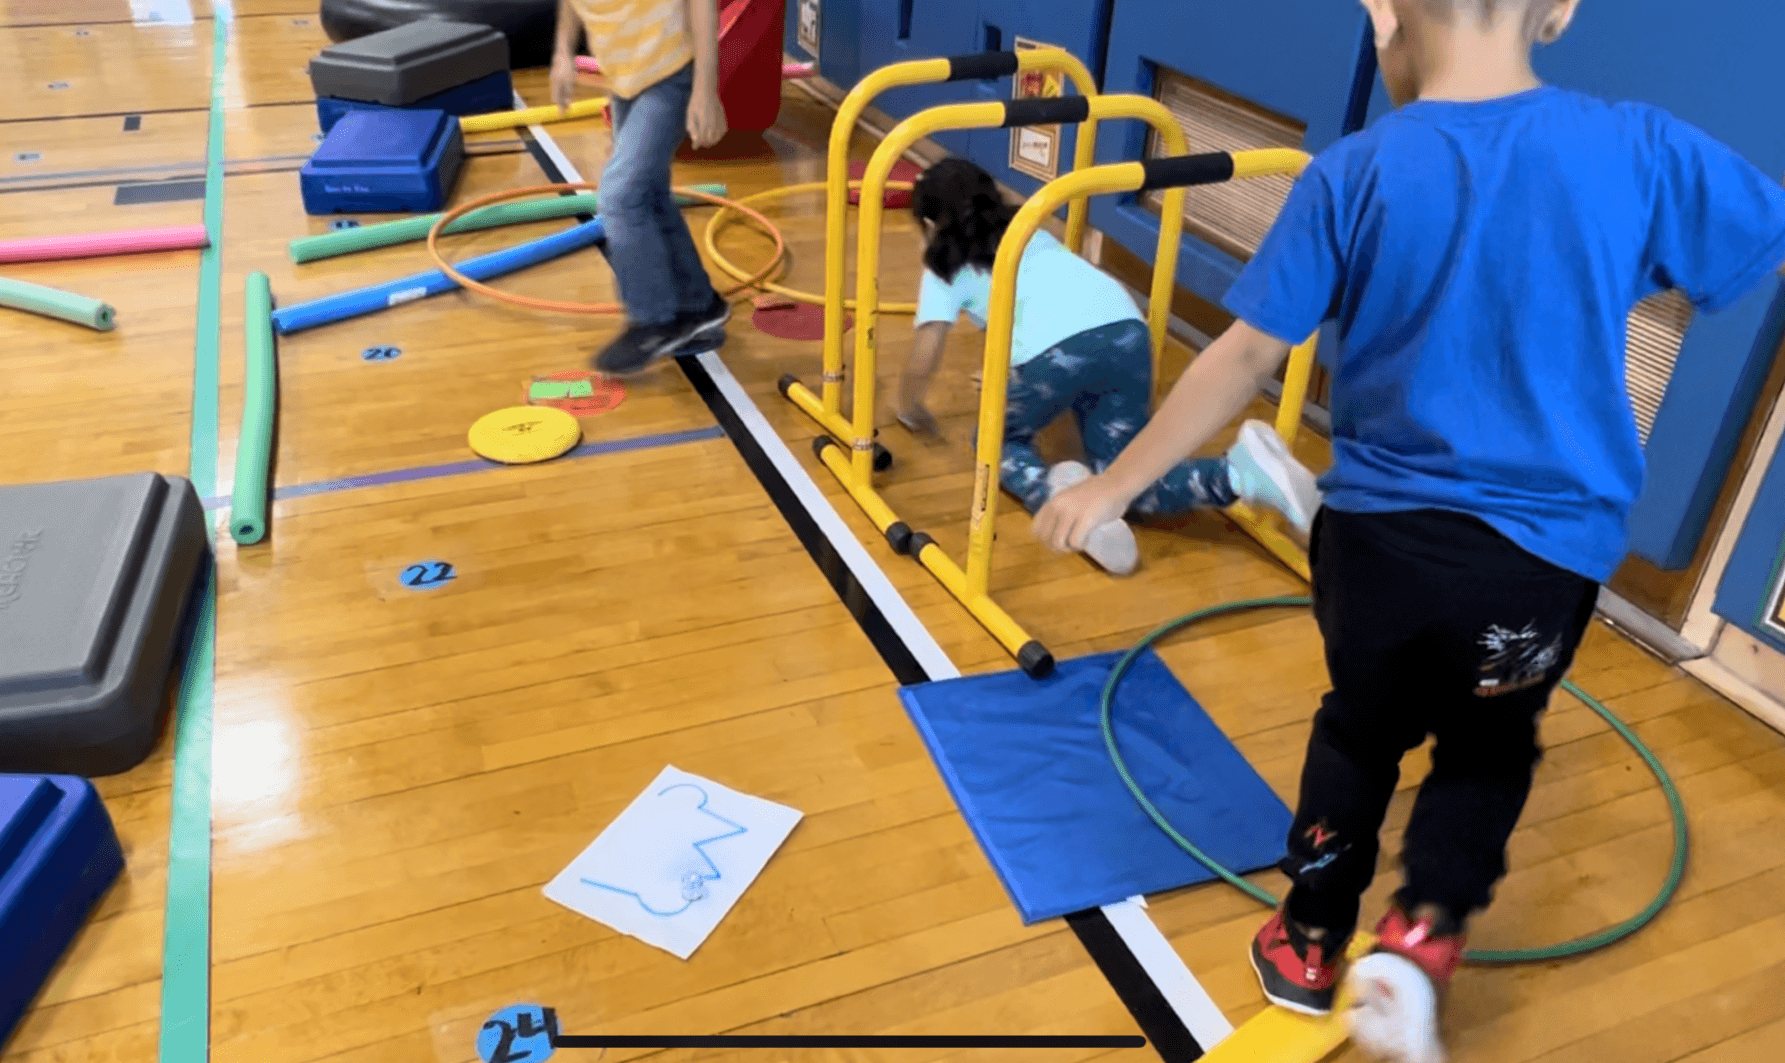
The students now had to engineer an obstacle course similar to the one they coded for their Ozobot. They were free to use any of the equipment in the gym. Once the obstacle course was created, they would race their Ozobot through the course, (The Ozobot raced the path on the paper and the students raced the Ozobot through the obstacle course while performing the coded locomotor skills). The students were so excited at the opportunity to race a robot! A lot of my students expressed that it was their favorite PE day ever!
I find games like this challenge our students to think critically, explore different design ideas, collect data, allow opportunities to reflect on pros and cons, and have time to redesign have a greater lasting impact on learning. Students learn that failures and mistakes are necessary step to learning. It also allows us a teaching opportunity to discuss coping strategies our students can use in times of frustration thereby improving their resiliency. These are lessons that will stay with them forever.